Happy Friday!
Friday, June 25, 2010
Thursday, June 24, 2010
Giga Ball
This is a Giga Ball. It is a life-size inflatable ball that you can get in.
You can roll around in it--and yes, even I could get in it.
You can push it, bounce it and climb on it.
However, I don't think that Kenscott Ltd. had this in mind when they designed the Giga Ball.

Now this kid kind of missed the hole.
and went right over the top.
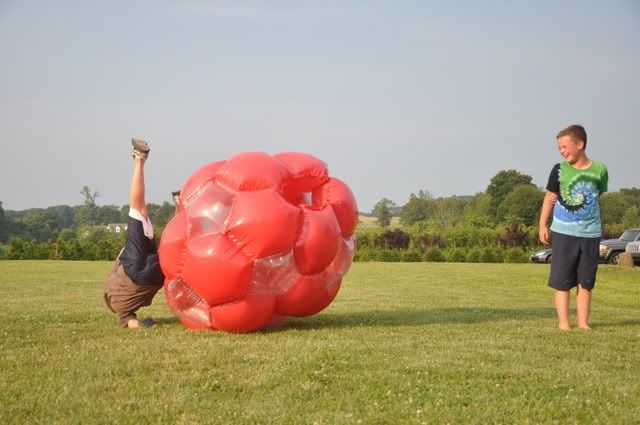
Do you think his mom is surprised that he has a broken arm?
You can roll around in it--and yes, even I could get in it.
You can push it, bounce it and climb on it.
However, I don't think that Kenscott Ltd. had this in mind when they designed the Giga Ball.

Now this kid kind of missed the hole.
and went right over the top.

Do you think his mom is surprised that he has a broken arm?
Wednesday, June 23, 2010
Tickle Therapy
Today, Ammy decided to join the work force.
These are the business cards she made up.
Sign up for your Tickle Treatment now...I'm sure she is going to be very busy.
Tuesday, June 22, 2010
She's Got Mad Skillz
My kids have been watching Minute to Win It a lot lately. I have to say that it is a pretty fun show to watch.
This morning I found Ammy playing Ka-Broom in my kitchen. The object of the game is to hit the marshmallow off of the plate with a broom handle and catch the flying marshmallow in a cup.
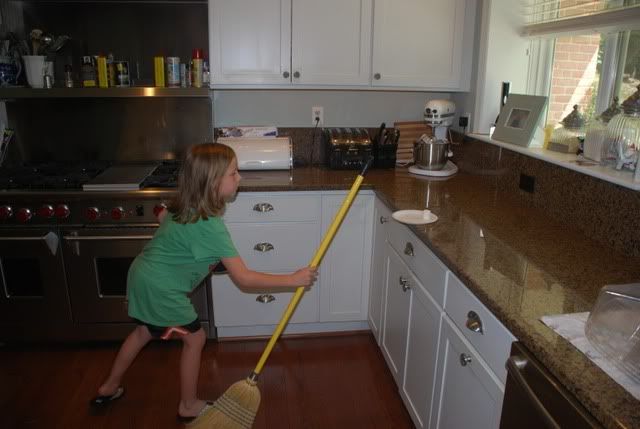
She must have practiced it 1,234,789 times.
SUCCESS!
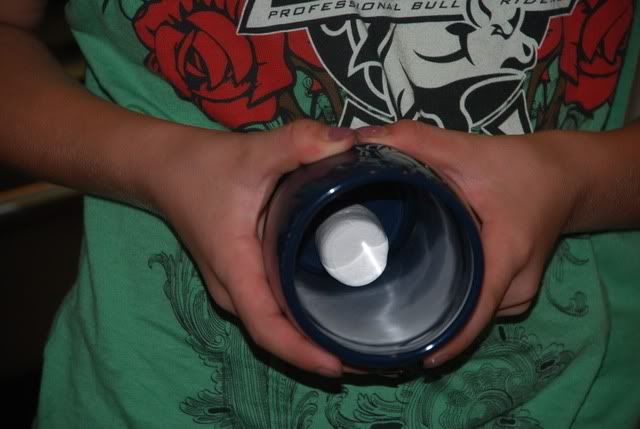
We're taking this show on the road!
This morning I found Ammy playing Ka-Broom in my kitchen. The object of the game is to hit the marshmallow off of the plate with a broom handle and catch the flying marshmallow in a cup.

She must have practiced it 1,234,789 times.
SUCCESS!

We're taking this show on the road!
Monday, June 21, 2010
Show Me the Money Lei
Last week my brother-in-law turned 21 and we went to a surprise party for him. Rather than write him a check, I decided to make a money lei for him to wear at the party. It was super easy to make, but took awhile to assemble. It's the perfect thing to do while sitting around watching tv.
First, cut a 10 foot piece of ribbon (this will seem really long, but trust me when I say that you can always cut some off and you don't want to realize that you don't have enough ribbon when you are half way through.) Fold the ribbon in half. Tie a knot leaving a loop at the top.
Take a dollar bill and lay it flat.
Fold the dollar bill in half horizontally. Then unfold the dollar.

Then fold the dollar vertically. Fold the end in about 1/2-3/4 inch.

Continue to accordian fold the dollar bill until you get to the other end. (Kids love to do this part--the folds don't have to be perfect.)

Fold the folded bill in half. (this is where the horizontal fold makes it easy to fold in half)
Place the dollar bill in between the two ribbons.
Tie a double knot at the bottom of the dollar bill.
Take a plastic drinking straw.
Cut a small piece (1/4 inch) of the straw.
Thread the piece of straw onto the two pieces of ribbon. The straw will serve as a spacer and will give the necklace some structure.
Tape one side of the dollar bill together.
Tape the other side together.
Repeat with another dollar bill.
Keep adding bills until you have the amount that you want on the necklace. The necklace above has $62 on it--I was going for $100, but it would have been too long. $50 is probably the perfect amount.
When you are finished with the necklace, tie it together and cut off any extra ribbon. You can add a medallion if you want. I printed a 4" x 4" white 21 on a black background. (I used photo paper so it would be glossy) I then used my circle cutter to cut it out. I attached it to the lei using clear elastic thread.
It was a huge hit!

I am linking up to these parties today. Go check out all the great crafts:

First, cut a 10 foot piece of ribbon (this will seem really long, but trust me when I say that you can always cut some off and you don't want to realize that you don't have enough ribbon when you are half way through.) Fold the ribbon in half. Tie a knot leaving a loop at the top.
Take a dollar bill and lay it flat.
Fold the dollar bill in half horizontally. Then unfold the dollar.

Then fold the dollar vertically. Fold the end in about 1/2-3/4 inch.

Continue to accordian fold the dollar bill until you get to the other end. (Kids love to do this part--the folds don't have to be perfect.)

Fold the folded bill in half. (this is where the horizontal fold makes it easy to fold in half)
Place the dollar bill in between the two ribbons.
Tie a double knot at the bottom of the dollar bill.
Take a plastic drinking straw.
Cut a small piece (1/4 inch) of the straw.
Thread the piece of straw onto the two pieces of ribbon. The straw will serve as a spacer and will give the necklace some structure.
Tape one side of the dollar bill together.
Tape the other side together.
Repeat with another dollar bill.
Keep adding bills until you have the amount that you want on the necklace. The necklace above has $62 on it--I was going for $100, but it would have been too long. $50 is probably the perfect amount.
When you are finished with the necklace, tie it together and cut off any extra ribbon. You can add a medallion if you want. I printed a 4" x 4" white 21 on a black background. (I used photo paper so it would be glossy) I then used my circle cutter to cut it out. I attached it to the lei using clear elastic thread.
It was a huge hit!
I am linking up to these parties today. Go check out all the great crafts:

Subscribe to:
Posts (Atom)